
S0020O- 7B. Bookmarks And Cross-References
In Word, a bookmark is a named location within a document that you can directly jump to via a hyperlink. A cross-reference is a link that connects one part of a document to another (e.g., figure or table).
Bookmarks
To create a bookmark:
- Navigate to the point in your document where you want to create a bookmark.
- Click Bookmark in the Links group of the Insert tab of the Ribbon. The Bookmark dialog box opens up.
- In the Bookmark name field, give the bookmark a descriptive name (no spaces allowed in the name).
- Click the Add button. The bookmark is created and the dialog box closes out.
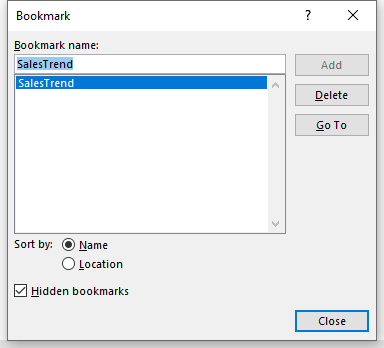
Bookmark Dialog BoxYou can use the Bookmark dialog box to navigate your document using your bookmarks and to delete your bookmarks. To navigate your bookmarks, open the Bookmark dialog box, highlight the bookmark to jump to, and click the Go To button. To delete a bookmark, highlight the bookmark and click the Delete button.
You can create hyperlinks to your bookmarks to navigate.
To create a hyperlink to a bookmark:
- Highlight the text or click the object to apply the hyperlink to.
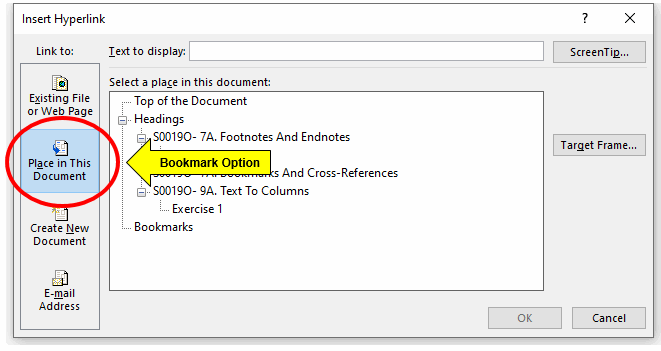
- Click Link in the Links group of the Insert tab of the Ribbon. The Insert Hyperlink dialog box opens up.
- In the Link to section, select Place in This Document and select your bookmark.
- Click OK. The link is created. Press the Ctrl key on the keyboard while you click the link to jump to it. For an electronic saved file (e.g., PDF), click the link directly.
Insert Hyperlink Dialog BoxCross-References
A cross-reference can refer to a bookmark, footnote, endnote, equation, figure, or table. Earlier we saw how to create footnotes, endnotes, and bookmarks. Figures and tables are created using the Insert Caption tool found in the Captions group of the Insert tab.
To create a figure or table caption:
- Click the object (e.g., picture or table) to apply the caption to.
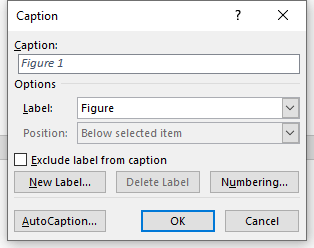
- Click Insert Caption in the Captions group of the References tab of the Ribbon. The Caption dialog box opens up.
- In the Label field, select the type of caption to create (e.g., Figure or Table).
- In the Caption field, type the caption text.
- In the Position field, select the location of the caption relative to the selected object.
- Click OK. The caption is created.
Caption Dialog BoxTo create a cross-reference to a caption:
- Go to the location where you want the cross-reference to appear.
- Click Cross-reference in the Captions group of the References tab of the Ribbon. The Cross-reference dialog box opens up.
- Select the Reference type (e.g., Figure or Table).
- Set the Insert reference to option. Entire caption will include caption number and text.
- Choose the specific caption you want to link to from the For which caption list.
6, Click Insert to drop in the cross-reference. Close the dialog box. Press the Ctrl key on the keyboard while you click the cross-reference to jump to it. For an electronic saved file (e.g., PDF), click the cross-reference directly.

Cross-Reference Dialog BoxTable Of Figures
A Table of Figures is a list that compiles all the images, graphs, charts, and tables within a document, that have a caption. Page numbers are included, essentially acting like a mini-table of contents. It helps readers quickly navigate to specific objects by providing them a centralized overview of the objects.
To create a Table of Figures:
- Add captions to all the figures and tables you want to include in the table.
- Click where you want to insert the table of figures.
- Click Insert Table of Figures in the Captions group of the References tab of the Ribbon. The Table of Figures dialog box opens up.
- For the Caption label option, pick the table type to create (e.g., Figure or Table).
- Click OK. The table drops in. Press the Ctrl key on the keyboard while you click the reference to jump to it. For an electronic saved file (e.g., PDF), click the reference directly.
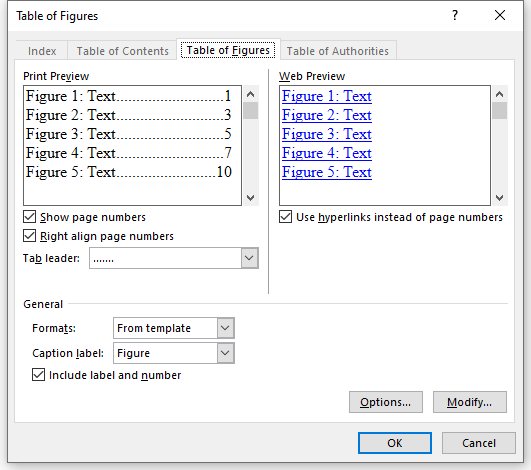
Table Of Figures Dialog BoxExercise 1
Video Demo 1 – How to work with bookmarks