
S0020O- 7C. Indexing
Indexing refers to the process of creating a list of key topics or terms discussed within a document, along with the corresponding page numbers where they appear, essentially acting as a searchable reference guide. Typically, they are placed at the end of the document to help readers quickly navigate to specific information.
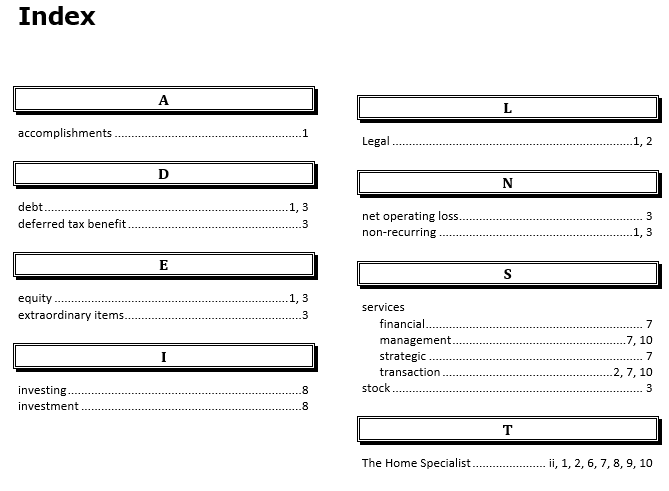
Index ExampleYou can manually mark specific words or phrases within your document as index entries or use a concordance file to mark them. A concordance file is a Word document that contains a two-column table used to mark index entries in a Word document. The first column contains the words or phrases to index, exactly as they appear in the document and the second column contains how the entries should appear in the index.
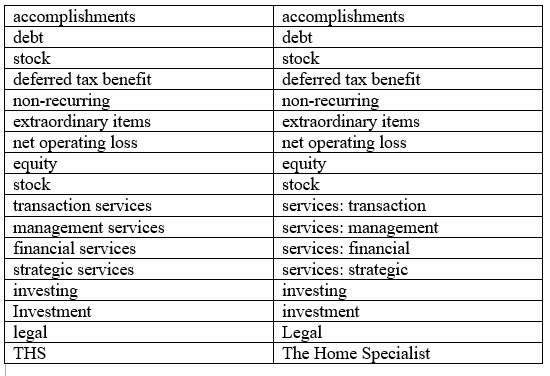
Concordance File Table ExampleManually Mark Specific Words
- Highlight the word or phrase you want to include in the index.
- Click Mark Entry in the Index group of the References tab of the Ribbon. The Mark Index Entry dialog box opens up with the highlighted word or phrase in the Main entry field.
- If you would like entry to appear differently in the index, place how it should appear in the Subentry field.
- Click Mark to mark the one entry or click Mark All to mark every occurrence of the word or phrase in the document. The word or phrase is marked and the document is taken into the reveal codes mode. You will see the index code next to the word. Note to remove an indexed word or phrase entry, delete its code.
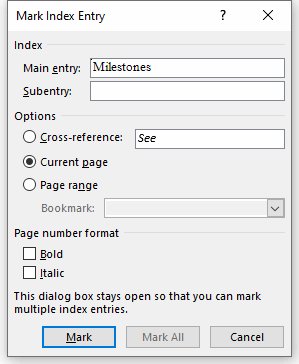
Mark Index Entry Dialog Box- Click Close to exit the Mark Index Entry dialog box. You can go back to hiding the codes by clicking the Show/Hide tool in the Paragraph group of the Home tab of the ribbon.
Using A Concordance File
Concordance files are a good way to mark index entries in bulk, especially for large documents. They help build an index page more quickly without manual marking the entries. A concordance file is a Word document made up of a two-column table used to mark index entries. Nothing else appears in the concordance file other than the table. The first column contains the words or phrases to index and the second column contains how the entries should appear in the index. In the second column, you can create subentries by separating the words or phrases with a colon (:).
To create an index using a concordance file:
- Click Insert Index in the Index group on the References tab of the Ribbon. The Index dialog box opens up.
- Click Automark. The Open Index AutoMark dialog box opens up.
- Navigate to the folder with the concordance file, highlight the file, and click Open. The words or phrases are all marked and the document is taken into the reveal codes mode. You can go back to hiding the codes by clicking the Show/Hide tool in the Paragraph group of the Home tab of the ribbon.
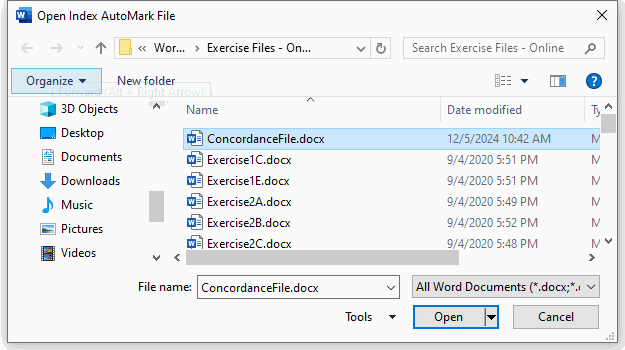
Open Index AutoMark Dialog BoxInserting The Index Table
The index table will give the list of indexed terms along with their page numbers. Typically, it is placed at the end of a document.
To create an index table:
- Place the cursor where the index table should appear.
- Click Insert Index in the Index group on the References tab of the Ribbon. The Index dialog box opens up.
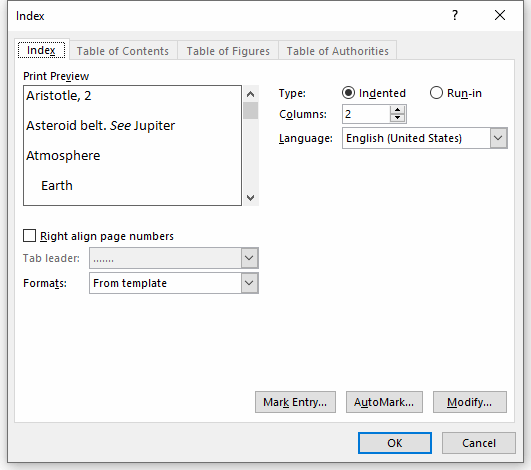
Index Dialog Box- Adjust the appearance of the index. Select the Formats template (e.g., Fancy). Check Right align page numbers if you want the page numbers on the right. Select a Tab leader if desired. Observe its look in the Print Preview box
- Click OK to generate the index table.
To update the index table if you make changes to the index entries, click on the table and click Update Index in the Index group on the References tab of the Ribbon. You can also click on the table and press the F9 key on the keyboard.
Exercise 1
Video Demo 1 – How to use the create an index.